Last Updated on November 22, 2023 by admin
Some people do it every week, while others do it every month. In reality, the answer is that it depends! The size of your tank, the number of fish you keep, and the amounts of biological filtration (e.g., beneficial bacteria and live plants) are some of the factors. You can use our free guide to how frequently your aquarium needs to be cleaned.
For your first aquarium, you may need some tank maintenance supplies, including:
- Kit for testing aquarium water
- Container for holding dirty aquarium water
- Stylus for algae scraper (for glass)
- Blade attachment for algae scraper (for glass or acrylic)
- Brush for cleaning algae off decorations or plants
- Scissor for trimming plants
- Declinator (also known as water conditioner)
- Glass cleaner
- and paper towel
- Glass-cleaning cloth or paper towel
- A gravel vacuum (also known as an aquarium siphon)
Step 1: Test the Water Quality:
As soon as your aquarium is set up, and it still hasn’t been cycled, test the water for amounts of ammonia, nitrites, and nitrates under 40 parts per million. It can be dangerous for fish when waste compounds are present in high concentrations.
Keeping nitrate levels less than 40 ppm increases the chances of keeping your aquarium cycled. Assess the nitrate levels in your water using a water test kit before removing any water, and if further action is necessary.
Step 2: Get rid of algae:
Using an algae scraper, clean the tank walls so that we can see our fish. If you have a blade attachment, slicing through algae spots should be no problem. Make sure not to catch any substrate under the algae scraper, or your glass or acrylic may be scratched.
If algae have grown on the lid, you can easily wash it off in the sink. If you notice algae on your aquarium decor, rocks, or plants, find a clean toothbrush and gently brush it off, either over the sink or in the aquarium. (Do not use soap, as the soap might harm your fish.)
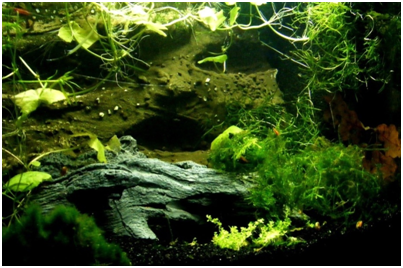
Step 3: Cut back the plants:
Trim overgrown foliage and remove any dead leaves from aquarium plants . Taking a few inches off the tops of tall stem plants and replanting them into their substrate is an easy way to propagate them. If your Vallisneria or dwarf Sagittaria is spreading in unwanted locations, remove the little runners and place them somewhere else. Last but not least, if floating plants have completely covered the entire water surface, you should remove about 30% to 50% of them so the plants beneath get enough light and the fish get enough oxygen.
Step 4: Vacuuming the Substrate:
Take out your aquarium siphon and vacuum the substrate by about one-third. Whenever possible, move decorations or hardscapes since debris tends to accumulate under them. Fish waste, uneaten food, dead leaves, and uneaten food from the gravel or sand are all removed by the siphon.
Step 5: Go to the equipment and turn it off:
Make sure all equipment is turned off or unplugged before removing any water. When operating a heater or filter in dry air, they can be damaged. This is because aquarium equipment is not meant to run without water.
Step 6: Make sure the filter is clean:
You should clean the filter at least once a month. It’s common for beginners to imagine filters as black holes where fish waste and detritus disappear magically from the water. Filters are mainly used to collect waste; however, someone is still responsible for taking out the garbage can. Like filters, fish waste accumulates in filters, so it’s important to clean them regularly so that the gunk does not clog up or cause them to overflow.
To clean your hang-on-back, canister, and corner box filters, you simply need to swish them around and then rinse them in a bucket of water you recently removed from your tank. (Again, avoid using soap.) If you have a sponge filter, remove the foam portion and wring it repeatedly in the old tank water.
Step 7: Fill up the water:
The tank is now ready for fresh, clean water to be added that matches the aquarium’s existing water temperature. It only takes a couple of degrees for hands to sense temperature, so adjust the faucet until the tap water feels warm enough. Fill up the bucket with tap water and empty the old tank water (which can be used to feed plants indoors and outdoors). You can either add a de-chlorinator to the bucket (dosed based on the bucket’s volume) or directly into the aquarium (dosed based on the aquarium’s volume).
Step 8: Turn on the equipment:
Even though you just spent all that time cleaning the tank, it probably looks dirtier than ever with all those particulates in the water. If the debris doesn’t settle down or at least becomes trapped by the filter within an hour or so, turn on the heater and filter again.
Step 9: Clean the glass:
Wipe down the outside walls of the aquarium with aquarium-safe glass and acrylic cleaner to remove any water spots and smudges. Also, clean off the dust that has accumulated on the lid, light, and aquarium stand.
Before putting fish in water, how long should you let it sit?
There’s an old-school piece of advice based on the fact that municipalities often put chlorine in tap water (which kills fish), but if you leave the water out for 24 hours, the chlorine evaporates. Most tap water nowadays contains chloramine (a more stable form of chlorine), which doesn’t evaporate over time. Dechlorinated water is immediately used in your aquarium without the need for any waiting period after the water conditioner is added to it.